Rocking Stepper Card Template: Designing 3D Cards That Actually Work
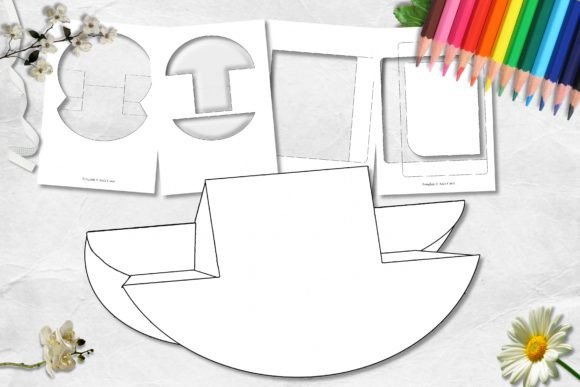
There is a specific kind of magic that happens when a flat piece of paper transforms into a three-dimensional object that moves. This is the core appeal of the Rocking Stepper Card Template. Unlike standard greeting cards that sit passively on a table, this design invites interaction. The recipient pushes it, and it rocks back and forth, creating a dynamic visual experience that captures attention immediately. Whether you are a hobbyist looking for a unique weekend project or a small business owner trying to stand out in a crowded market, understanding how to utilize this template correctly can make the difference between a charming keepsake and a frustrating craft failure.
Many people assume that because a digital file is provided, the result will be perfect with minimal effort. However, the transition from a digital design to a physical, moving card requires careful planning. If you skip the necessary preparation steps, you might end up with a card that doesn't rock, tears easily, or looks unprofessional. This guide breaks down exactly what you need to know to ensure your Rocking Stepper Card Template delivers the high-quality results you expect.
Digital vs. Physical: Choosing Your Path
The first decision you must make involves your production method. The template is versatile enough to support two distinct approaches: digital layer-based design or traditional physical crafting. Both methods have their merits, but they require different skill sets and tools.
If you choose the digital route, you will need software capable of handling layers, such as Adobe Photoshop or Illustrator. This approach allows you to use digital patterned papers and graphics to create a seamless look before printing. The advantage here is precision; you can align every element perfectly before the ink hits the paper. However, a common mistake beginners make is ignoring the resolution settings. If you print at a low resolution, the fine details of the "stepper" mechanism may blur, ruining the mechanical function of the card.
Alternatively, you can print directly onto card stock and use craft embellishments and stamps. This method offers a tactile, handmade feel that many customers love. Yet, there is a significant pitfall here regarding material weight. If your card stock is too thin, the rocking motion will cause the card to flop over rather than move smoothly. Conversely, if the paper is too thick, the hinges may not fold properly, causing the card to crack. You must find a balance where the paper is sturdy enough to hold its shape but flexible enough to bend repeatedly without damage.
The Envelope Challenge
One often overlooked component of the Rocking Stepper Card Template is the envelope. Because these cards have depth and movement, a standard flat envelope will not suffice. The template includes a design for an envelope specifically meant to accommodate the 3D structure, but users frequently ignore this detail.
Using a generic envelope can lead to several issues. First, the card may get stuck inside, preventing the recipient from opening it easily. Second, the friction of forcing a thick, moving card into a tight space can damage the delicate folds. Third, from a presentation standpoint, a flimsy envelope undermines the premium feel of the card itself. Before you finalize your order or start cutting, check the dimensions of your finished card against the provided envelope template. Ensure there is enough clearance for the rocking action so the card slides in and out without resistance.
Pitfalls in Cutting and Folding
Even with the best materials and designs, the final assembly is where most projects go wrong. The mechanics of a rocking card rely entirely on precise scoring and folding. A frequent error is attempting to fold the card without scoring the crease lines first. When you force heavy card stock to bend without a pre-scored line, you risk creating jagged edges or white stress marks that ruin the aesthetic.
To avoid this, always use a bone folder or a dull knife to score the fold lines before bending them. This creates a clean, sharp edge that ensures the card rocks smoothly. Another critical mistake is misaligning the cutouts. The "stepper" effect depends on the exact positioning of the moving parts relative to the base. If your cuts are even slightly off-center, the card may wobble awkwardly or fail to return to its upright position after being pushed.
Evaluating Quality Before You Commit
Whether you are buying a pre-made template or designing your own, evaluation is key. Do not simply download the first file you see. Look for reviews or samples that demonstrate the card in motion. A static image cannot show you if the card actually rocks or if it falls apart after one push. Check the file specifications to ensure they match your printer's capabilities. For instance, some templates are designed for professional offset printers and may not work well on home inkjet machines due to ink saturation issues.
Consider the longevity of your creation. A card that works great today but falls apart next week is a poor investment of time and money. Ask yourself: Is the adhesive I am using strong enough to hold the moving parts? Will the colors fade if the card is displayed in direct sunlight? These questions help you anticipate potential failures before they happen.
Practical Tips for Success
- Test Run: Always create a prototype using cheap paper before committing to expensive card stock. This allows you to test the rocking mechanism and adjust your cuts without wasting resources.
- Adhesive Choice: Use a glue that dries clear and remains flexible. Rigid glues can stiffen the hinge area, preventing the card from moving.
- Weight Matters: Stick to card stock between 160gsm and 250gsm for the best balance of durability and flexibility.
- Enforce the Hinge: Remember that the "hinge" is the secret to the movement. It must be scored lightly but completely across the entire width of the fold.
By paying attention to these details, you transform the Rocking Stepper Card Template from a simple digital file into a functional piece of art. The goal is to create something that brings joy through interaction, not frustration through complexity. With the right materials, careful planning, and a bit of patience, you can produce cards that leave a lasting impression on anyone who receives them.